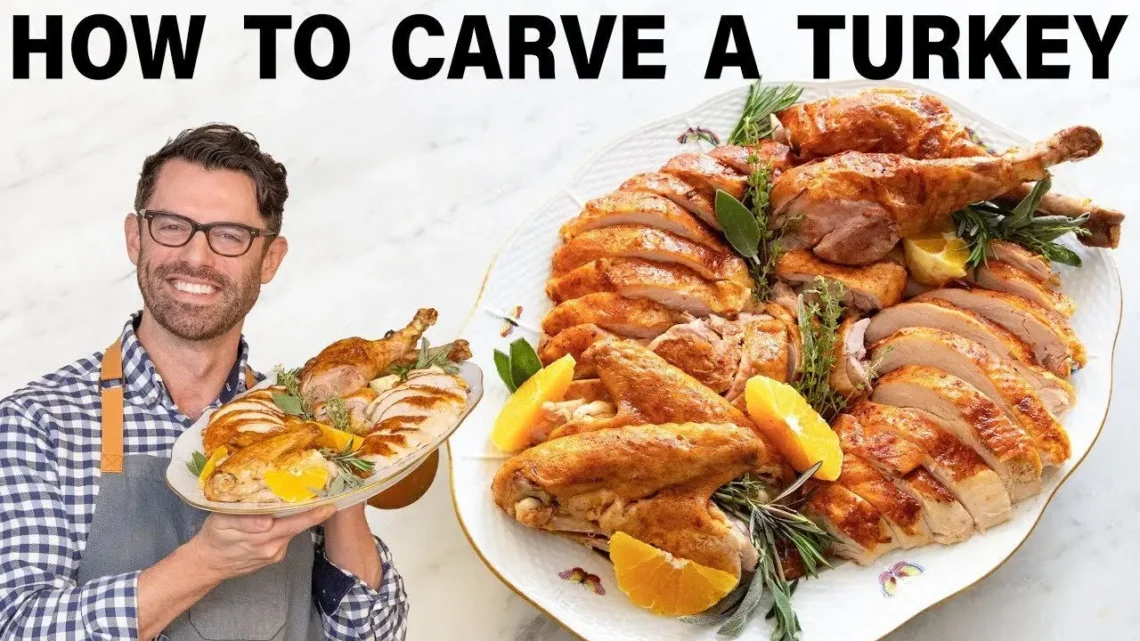
The best way to carve a turkey starts before you even pick up a knife. Most people rush this step — and that is exactly why their turkey ends up dry, messy, and falling apart on the platter.
This guide will show you how to carve a turkey step by step so every slice looks beautiful, stays juicy, and makes your Thanksgiving table look like it came out of a magazine.
Whether this is your very first time or your tenth, you will walk away feeling confident. Let’s do this the right way.
Why Resting Your Turkey Before Carving Is So Important
Before you even think about picking up your sharp knife for carving turkey, you need to let that bird rest. This is the most skipped step in turkey carving — and skipping it is the single biggest mistake people make.
Here is what actually happens when your turkey comes out of the oven. All the juices inside are boiling hot and moving fast. If you cut into the turkey right away, all those juices pour out onto your cutting board and are gone forever. That is why people end up with dry turkey even after cooking it perfectly.
When you let the turkey rest, those juices calm down and soak back into the meat. Every single bite stays moist and flavorful.
| Turkey Size | Minimum Rest Time | Ideal Rest Time |
|---|---|---|
| Under 12 lbs | 20 minutes | 30 minutes |
| 12–18 lbs | 30 minutes | 40 minutes |
| 18–24 lbs | 40 minutes | 45–50 minutes |
| Over 24 lbs | 45 minutes | 60 minutes |
How to rest the turkey correctly:
Loosely lay a piece of aluminum foil over the top of the turkey — do not wrap it tight. Tight wrapping traps steam and makes the skin go soft and soggy.
Just drape it gently like a blanket and let the bird sit on the counter. Room temperature is fine. Your turkey will still be very warm inside after 45 minutes — do not worry about it going cold.
One more thing: while the turkey is resting, this is the perfect time to finish your gravy, warm your sides, and set the table. The timing works out perfectly.
Tools You Need to Carve a Turkey
Having the right tools makes carving a Thanksgiving turkey fast, clean, and easy. The wrong tools make it frustrating. Here is everything you need to have ready before you start.
Best Knife for Carving Turkey (Regular vs. Electric)
Your knife is the most important tool on this list. Let’s settle the debate once and for all.
| Regular Carving Knife | Electric Carving Knife | |
|---|---|---|
| Best for | Most home cooks | Large birds (18 lbs+) |
| Slice control | Very high | Medium |
| Speed | Medium | Fast |
| Noise | Silent | Buzzes/hums |
| Price | $20–$80 | $25–$60 |
| Skill needed | Some practice | Very easy |
| Best slice quality | Thinner, cleaner | Slightly rougher edge |
| Cleaning | Easy | More parts to wash |
For most people, a regular sharp carving knife wins. You get better control, thinner slices, and a cleaner cut. A good carving knife is 10–12 inches long with a thin, pointed blade.
If you have a large bird over 18 pounds and your hands get tired easily, an electric carving knife will do the job well.
The most important rule with any knife: it must be sharp. A dull blade is actually more dangerous than a sharp one because you have to push harder, which causes slipping. Run your knife through a sharpener or use a honing steel before you start.
Never use:
- A serrated bread knife (tears the meat)
- A short paring knife (too small, no control)
- Any knife that feels wobbly or dull
What Else You Need Ready
| Tool | Why You Need It | Budget Pick |
|---|---|---|
| Large cutting board with a juice groove | Catches all the drippings so your counter stays clean | $25–$40 |
| Carving fork | Holds the turkey steady while you cut | $10–$20 |
| Large serving platter | Holds all the sliced meat beautifully | $15–$40 |
| Paper towels | Grip the hot drumstick and dry your hands | Already have it |
| Small bowl or measuring cup | Catches extra drippings for gravy | Already have it |
| Kitchen towel or oven mitt | Protects your hand when the turkey is still hot | Already have it |
| Tongs | Moves pieces without piercing and losing juice | $8–$15 |
Pro tip almost nobody mentions: Place a damp kitchen towel or a non-slip mat under your cutting board before you start.
A sliding cutting board while holding a sharp knife over a hot turkey is a recipe for disaster. This tiny step makes everything safer.
How to Set Up Your Carving Station
Setting up your carving station properly takes two minutes and saves you ten minutes of frustration later. Here is exactly how to do it:
Step 1 — Pick the right location. Choose your kitchen counter, not the dining table. You need room to move your elbows freely, and you do not want to deal with gravity pulling your turkey off a wobbly dinner table. Good lighting helps too — you want to clearly see where the joints are.
Step 2 — Non-slip base. Lay a damp towel flat on the counter, then put your large cutting board on top of it.
Step 3 — Juice catcher. If your cutting board does not have a juice groove around the edge, place a rimmed baking sheet under or beside it to catch drippings. Save every drop — that is liquid gold for your gravy.
Step 4 — Tools within reach. Set your carving knife, carving fork, paper towels, tongs, and serving platter all within arm’s reach before you bring the turkey over. You do not want to be reaching across a hot bird mid-carve.
Step 5 — Transfer the turkey. Lift the turkey out of its roasting pan carefully. Tilt it slightly so any juices inside the cavity run into the roasting pan — you want that for gravy. Place the turkey breast-side up on the cutting board.
Step 6 — Let it breathe. Remove the foil resting tent now. You are ready to carve.
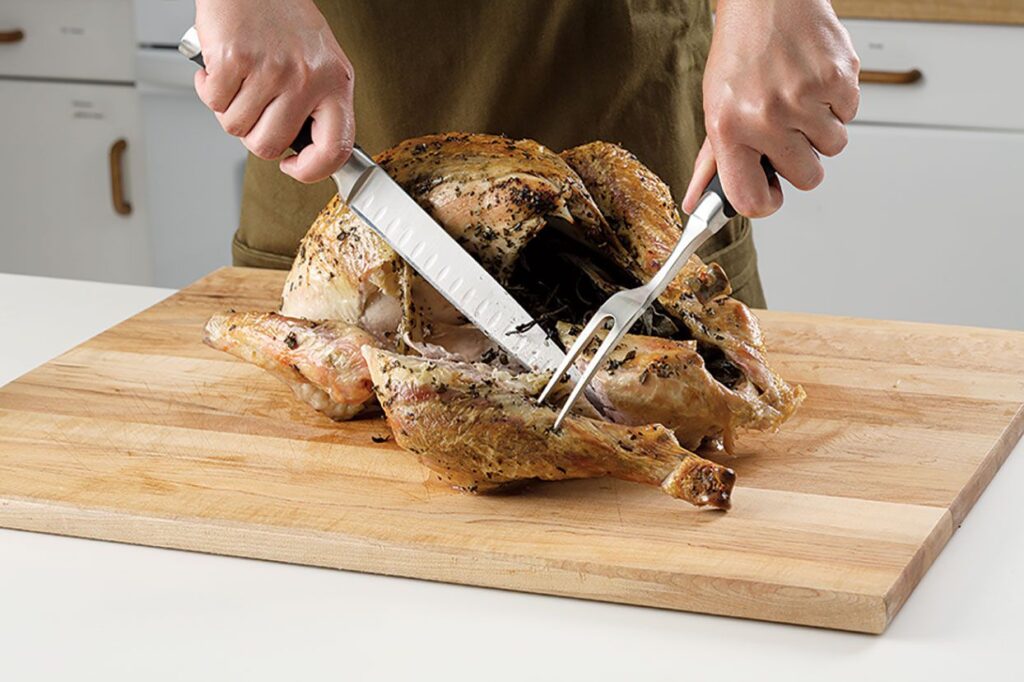
How to Carve a Turkey Step by Step
This is the best step-by-step turkey carving method used by professional chefs. It is simple, clean, and gives you the most meat with the least waste. Always start with the legs and thighs — never the breast. Here is why: the legs are on the outside and removing them first gives you full access to the breast meat without anything getting in your way.
Step 1 — Remove the Legs and Thighs
The leg and thigh come off as one piece first. This is called the leg quarter.
How to do it:
Pull the leg away from the body with your hand or a carving fork. You will feel it naturally want to move outward. Use your knife to cut through the skin between the leg and the breast, following the natural line of the bird.
Now push the leg down and outward firmly — you are looking for the hip joint where the thigh bone meets the body. When you find the right spot, the joint will pop open. Slide your knife right through that joint. No hacking, no sawing — just a clean cut through the cartilage.
If you are struggling to find the joint, push the leg back as far as it goes and look for where the bones connect. Cut there.
Repeat on the other side. You now have two leg quarters (thigh + drumstick attached) set aside on your platter.
Paper towel trick: The drumstick gets slippery and hot. Wrap a paper towel around the end of the drumstick for grip when you need to hold it.
Step 2 — Separate the Drumstick from the Thigh
Now separate the drumstick from the thigh — these are your two dark meat pieces.
Lay the leg quarter flat on your cutting board, skin-side down. You will see a clear line of fat running between the drumstick and the thigh. This line points right to the knee joint. Place your knife on that line and press down firmly. If you hit bone, move your knife slightly one way or the other until you slide through the joint cleanly.
You now have four pieces of dark meat: two drumsticks and two thighs.
| Piece | How to Serve It |
|---|---|
| Drumstick | Serve whole — people love picking these up |
| Thigh | Slice off the bone in strips, or serve bone-in |
For the thigh — lay it flat and use your knife to slice the meat away from the thigh bone. Cut thin strips against the grain of the meat (across the muscle fibers, not along them). This is what makes the difference between tender bites and chewy, stringy mouthfuls.
Step 3 — Remove the Breast Meat
Removing the breast meat cleanly is what separates a good carve from a great one. This is where most home cooks lose the most meat — it gets stuck on the breastbone and goes to waste.
How to do it:
Find the breastbone — it runs down the very center top of the turkey. Place your knife right alongside it, pressing the blade against the bone. Slice downward and outward, following the curve of the rib cage.
Use long, smooth strokes. Do not saw back and forth — that shreds the meat. Let the knife do the work. As you cut deeper, use your other hand (or the carving fork) to gently pull the breast meat away from the carcass.
The breast will come off in one large piece. Set it aside on your cutting board. Repeat on the other side.
Now slice the breast meat into even slices, about a quarter-inch thick, cutting across the grain. You will immediately notice the difference — slicing against the grain shortens the muscle fibers and makes every bite tender instead of tough.
Important: Always keep a bit of skin on each breast slice when you arrange the platter. The skin keeps the meat moist and looks beautiful.
Step 4 — Remove the Wings
The wings are last because they are small and tucked in close to the body.
How to do it:
Find where the wing connects to the body — the shoulder joint. Pull the wing away from the body to expose the joint. Slice through the skin, then find the joint and cut through it cleanly.
Wings are usually served whole or broken into two pieces (the flat and the drumette). You can do this by finding the elbow joint between them and cutting through it the same way — find the joint, press through the cartilage.
Wings do not have a lot of meat, but they are one of the most popular pieces at the table. Do not skip them.
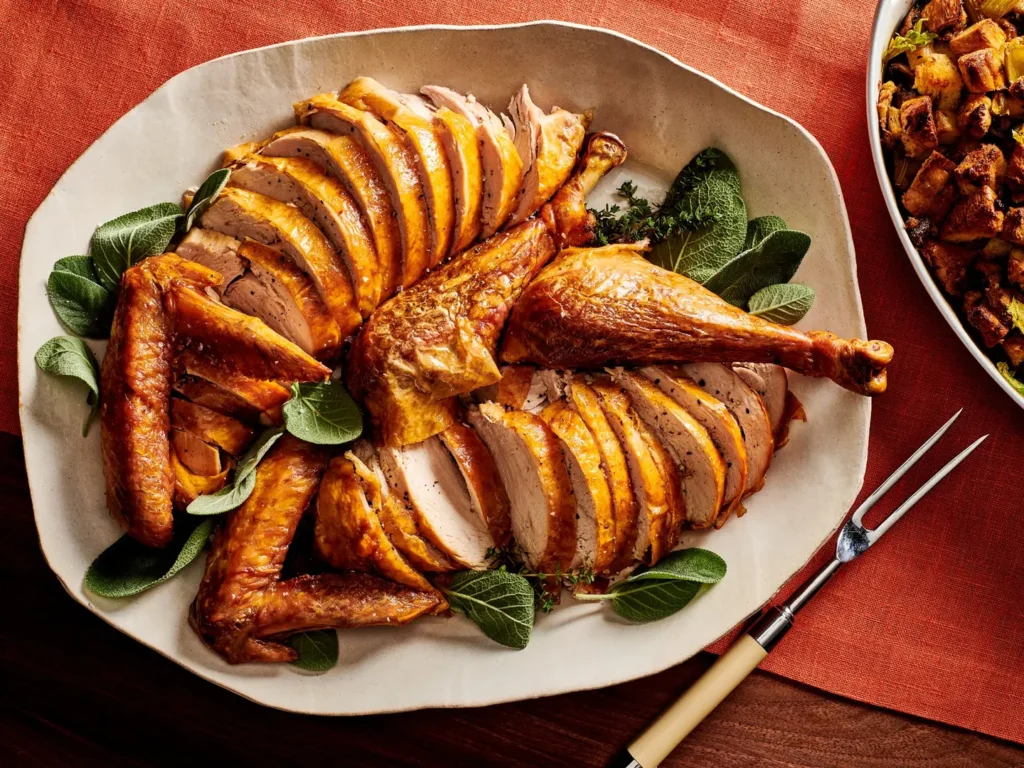
Step 5 — Slice Everything and Arrange the Platter
Now comes the fun part — arranging your turkey platter so it looks impressive and professional.
The best way to arrange a turkey platter:
| Platter Section | What Goes There |
|---|---|
| Center of platter | Sliced breast meat, fanned out in overlapping slices |
| Left side | Drumsticks (place these at the ends — they look dramatic) |
| Right side | Sliced thigh meat |
| Top and bottom | Wings |
| Garnish | Fresh herbs (rosemary, thyme), sliced oranges, cranberries |
Arrange the breast slices slightly overlapping each other like fallen dominoes. This is how you see it done on magazine covers and it takes about 30 seconds.
Keep your carved turkey warm: If dinner is running late, cover the platter loosely with foil and slide it into a 200°F oven. Add a couple of tablespoons of warm chicken broth over the top first to keep the meat moist. This works for up to 30–40 minutes without drying anything out.
Save every drop of juice from your cutting board — pour it into your gravy at the end. This step alone makes homemade gravy taste significantly better.
Common Turkey Carving Mistakes to Avoid
Almost every competitor skips this section entirely. These are the real reasons turkey carving goes wrong — and how to fix each one.
| Mistake | Why It Happens | How to Fix It |
|---|---|---|
| Cutting into the turkey too soon | Impatient — everyone is hungry | Rest it fully — see the rest time table above |
| Using a dull knife | Never thought to sharpen it | Sharpen before Thanksgiving day, not after |
| Starting with the breast | Feels like the obvious place to start | Always start with legs and thighs first |
| Cutting with the grain | Nobody explained the grain concept | Cut ACROSS the muscle fibers, not along them |
| Hacking instead of slicing | Trying to saw through bone | Find the joint and slice through cartilage instead |
| Letting the board slide | No grip underneath | Damp towel under the board — always |
| Not saving the drippings | Didn’t think about it | Keep a bowl next to the board from the start |
| Slices too thick | Rushing | Aim for quarter-inch slices — thinner = more tender feel |
| Removing the skin and throwing it away | Trying to be healthy | Keep skin on platter slices — it locks in moisture |
| Forgetting to save the carcass | Didn’t know it was useful | The carcass makes incredible turkey stock — save it |
How to Carve a Turkey Breast Only
Carving a turkey breast only is very common — especially if you are cooking for a smaller group of 4–6 people. A bone-in or boneless turkey breast is much easier to manage than a whole bird.
Bone-In Turkey Breast
A bone-in breast sits with the ribs as its base. Here is how to carve it:
1. Place the breast on your cutting board, skin-side up. The breastbone runs right down the center.
2. Hold the breast steady with your carving fork. Place your knife right next to the breastbone and slice downward, following the curve of the bone.
3. Use long, smooth strokes — never saw back and forth.
4. Once the breast half comes away from the bone, lay it flat on your board and slice crosswise into quarter-inch slices against the grain.
5. Repeat on the other side.
Boneless Turkey Breast
A boneless turkey breast is the easiest thing to carve. No joints, no bones to navigate:
1. Let it rest the same as a whole turkey — 20–30 minutes.
2. Place on your cutting board.
3. Slice straight down across the grain in quarter-inch slices.
4. Done.
Turkey Breast Carving by Size
| Breast Weight | Rest Time | Slicing Direction | Servings |
|---|---|---|---|
| 2–3 lbs | 15–20 min | Against the grain | 3–4 people |
| 4–6 lbs | 20–25 min | Against the grain | 5–7 people |
| 6–8 lbs | 25–30 min | Against the grain | 8–10 people |
How to Store and Reheat Leftover Turkey
Storing leftover carved turkey the right way keeps it juicy and safe to eat for days. Here is everything you need to know.
Storing Leftover Turkey
| Storage Method | How Long It Lasts | Tips |
|---|---|---|
| Refrigerator (airtight container) | 3–4 days | Add a splash of broth to keep moist |
| Freezer (freezer-safe bag) | 2–3 months | Remove as much air as possible |
| Room temperature | 2 hours maximum | Never leave carved turkey out longer than 2 hours — food safety risk |
Best way to store: Separate white meat and dark meat into different containers. They have different moisture levels and reheat better apart. Pour a few tablespoons of turkey broth or drippings over the meat before sealing — this makes a huge difference when reheating.
Label your containers with the date. Simple, but most people forget.
Reheating Leftover Turkey
Nobody wants dry, rubbery reheated turkey. Here is how to bring it back to life the right way:
Oven method (best quality):
- Preheat oven to 325°F
- Place turkey slices in a baking dish
- Add ¼ cup of chicken or turkey broth over the top
- Cover tightly with aluminum foil
- Heat for 20–30 minutes until warmed through
- Internal temperature should reach 165°F
Microwave method (fastest):
- Place turkey on a microwave-safe plate
- Add a splash of broth or water over the top
- Cover with a damp paper towel (this is the secret — it creates steam)
- Heat in 30-second bursts, checking each time
- Stop as soon as it is warm — over-microwaving makes it rubbery
Stovetop method (great for small amounts):
- Add a splash of broth to a skillet over medium-low heat
- Add turkey slices
- Cover with a lid for 3–5 minutes
- Flip once halfway through
| Reheating Method | Time | Quality | Best For |
|---|---|---|---|
| Oven at 325°F | 20–30 min | Best | Large amounts |
| Stovetop with broth | 5–8 min | Very good | Small portions |
| Microwave with damp towel | 2–3 min | Decent | Quick individual serving |
| Air fryer at 350°F | 5–7 min | Good for skin | Small pieces |
What to Do With the Turkey Carcass
Save the turkey carcass — do not throw it away. This is one of the biggest missed opportunities in all of Thanksgiving cooking. The carcass, along with leftover skin and any small scraps of meat, makes the most flavorful turkey stock you have ever tasted — and it costs you almost nothing extra.
How to Make Turkey Stock From the Carcass
This is simple and mostly hands-off:
What you need:
- Turkey carcass (broken into pieces if needed to fit the pot)
- 2 carrots, roughly chopped
- 2 stalks of celery, roughly chopped
- 1 large onion, quartered
- 4 garlic cloves
- A few sprigs of fresh thyme or rosemary
- 10–12 cups of cold water
- Salt and black pepper
How to make it:
Put the carcass in your largest pot. Add all the vegetables, herbs, and cold water. Bring it to a boil over high heat, then immediately turn it down to a gentle simmer. Let it simmer for 3–4 hours with the lid slightly ajar.
Strain everything through a fine mesh strainer. Discard the solids. What you have left is homemade turkey stock.
What to use it for:
- Turkey soup (best use)
- Gravy base
- Cooking rice or stuffing
- Freeze in ice cube trays for future use
Storage: Refrigerate for up to 5 days or freeze for up to 3 months. This stock is far better than anything from a can or carton.
Can you freeze the carcass to make stock later? Yes — put the whole carcass in a large freezer bag and freeze it. Make your stock the following weekend when you are not still full from Thanksgiving dinner.
Frequently Asked Questions
How long should a turkey rest before carving?
At least 20–30 minutes for most birds. Large turkeys over 18 pounds should rest 40–45 minutes. This lets the juices redistribute back into the meat so every slice stays moist. Do not skip this step.
Should I carve a turkey at the table or in the kitchen?
Always carve in the kitchen. You have more space, better lighting, a stable counter surface, and no audience watching you struggle. Carry the finished platter out to the table once everything is sliced and arranged. It looks more impressive that way anyway.
What is the best knife to carve a turkey?
A long, sharp carving knife — 10 to 12 inches — with a thin, flexible blade. For most home cooks, this beats an electric knife because you have more control and get thinner, cleaner slices. Whatever knife you use, make sure it is sharp before you start.
Where do you cut first when carving a turkey?
Always start with the legs and thighs. Removing them first gives you clear access to the breast. Never start with the breast — it is much harder to carve cleanly with the legs still attached.
How do I keep carved turkey from drying out?
A few things help: do not slice until you are ready to serve, keep a splash of warm broth nearby to drizzle over the platter, and cover loosely with foil if dinner is delayed. Store leftovers with broth poured over the top in a sealed container.
Can I carve a turkey the night before Thanksgiving?
Yes — this is actually a smart strategy for stress-free hosting. Carve the turkey the night before, store slices in an airtight container with broth poured over them, and refrigerate. Reheat in a 325°F oven covered with foil for 20–25 minutes on Thanksgiving day. The flavor is just as good.
How do I know when the turkey is done and ready to carve?
The internal temperature of the thickest part of the thigh (without touching the bone) must reach 165°F on a meat thermometer. The juices should run clear when you pierce the thigh with a knife. Never rely on color alone.
How long can carved turkey sit at room temperature?
No longer than 2 hours. After 2 hours at room temperature, bacteria can grow to unsafe levels. If your guests are eating slowly, keep the turkey covered in a 200°F oven to stay warm safely.
Is it better to slice turkey hot or cold?
Slicing it warm (right after the rest period) gives you the best texture and flavor. Cold turkey is easier to slice very thinly — some chefs prefer cold slicing for presentation, then reheating the slices in broth. Either way works.
How thick should turkey slices be?
About a quarter inch — roughly the thickness of a pencil. Thinner than that and the slices fall apart. Thicker than that and they can feel tough. For the drumstick and thigh, you can go slightly thicker since dark meat holds up better.
What do I do if the turkey is not done inside after I start carving?
Put the pieces back on a baking sheet, loosely tent with foil, and return to a 350°F oven for another 20–30 minutes. Check the temperature again before serving. This happens more often than anyone admits and is completely fixable.
How do I carve a smoked turkey?
A smoked turkey is more tender than a roasted one, so the meat falls away from the bone more easily. Use a very sharp knife and be extra gentle — especially with the breast, which can crumble if handled too roughly. The carving steps are identical: legs and thighs first, then breast, then wings. The smoke ring (the pink layer just under the skin) is normal and not a sign the turkey is undercooked.
Conclusion
Carving a turkey like a pro is not about being a professional chef. It is about knowing three things: rest the bird long enough, start with the legs not the breast, and always cut against the grain.
Follow the steps in this guide and you will have a beautiful platter of juicy, perfectly sliced turkey that makes everyone at the table impressed — including yourself. Sharp knife, stable cutting board, a little patience, and you are done.
Save that carcass for stock, store your leftovers with broth, and reheat low and slow. Nothing goes to waste, and tomorrow’s turkey sandwich will be even better than today’s dinner.
Here is your quick cheat-sheet to take to the kitchen:
| Step | What to Do | Time Needed |
|---|---|---|
| Rest the turkey | Loose foil tent, counter rest | 20–45 min |
| Set up your station | Board, knife, platter, bowl | 5 min |
| Remove the legs and thighs | Pull out, find joint, slice through | 4 min |
| Separate drumstick from thigh | Find knee joint, press knife through | 2 min |
| Remove the breast | Slice down alongside breastbone | 5 min |
| Remove the wings | Find shoulder joint, slice through | 2 min |
| Slice and arrange platter | Against the grain, fan slices out | 5 min |
| Total active carving time | ~18–20 minutes |
Happy Thanksgiving. Now go carve that turkey. 🦃